This guide will help you get started with LWN Multi-Step Checkout for WooCommerce. Follow the steps below to ensure Classic Checkout is enabled, configure your plugin settings, and customize your checkout flow for a smooth, multi-step experience.
Ensure Classic Checkout Is Enabled #
To use this plugin, your WooCommerce Checkout page must be set to the classic layout (shortcode-based).
Go to Pages → Checkout and make sure it contains the shortcode:
[woocommerce_checkout]
If you’re using the block editor:
- Open the Checkout template.
- Make sure it contains either:
- The [woocommerce_checkout] shortcode
- Or the “Classic Checkout” block (not the “Checkout block”)
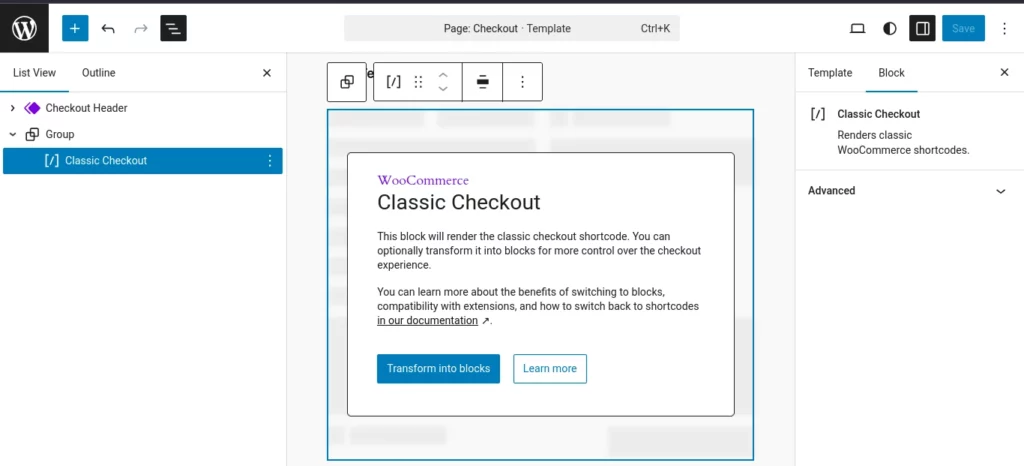
Block-based checkout pages are not yet supported — using one will prevent the multi-step layout from appearing.
Navigate to the Plugin Settings #
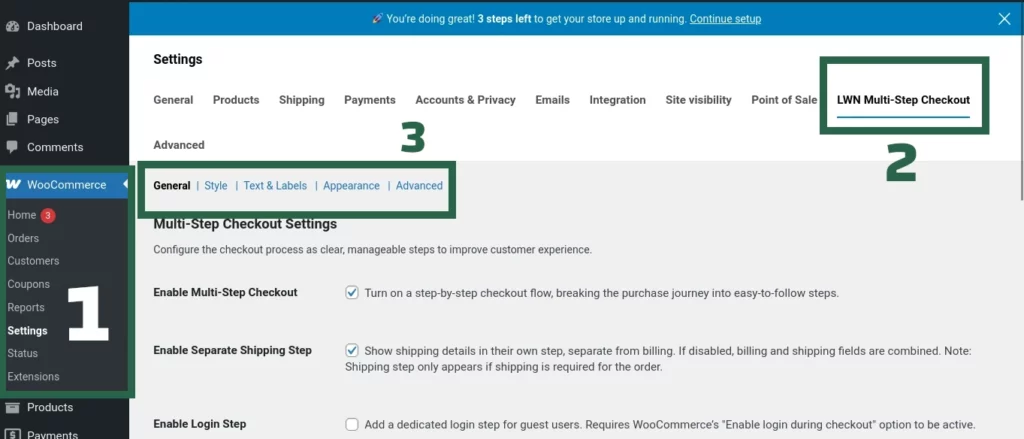
After activating the plugin, follow these steps to ensure it’s working properly:
- Go to WooCommerce → Settings → LWN Multi-Step Checkout.
- Make sure Multi-Step Checkout is enabled under the General tab.
- Configure your desired steps, labels, appearance, and styles using the provided tabs.
The plugin comes with smart defaults, but you’re encouraged to customize the experience to match your store’s flow and branding.


